How to use a buzzer with Arduino
A piezo buzzer is a small device that converts electrical signals into sound waves. Unlike traditional speakers, piezo buzzers operate on the piezoelectric effect. When a voltage is applied, the buzzer's piezoelectric crystal deforms, producing sound waves. This simplicity makes piezo buzzers cost-effective, lightweight, and ideal for applications where the space is limited.
Components
| 1x Arduino Nano (or another Arduino module) $3.38 |
| 1x Mini-breadboard
|
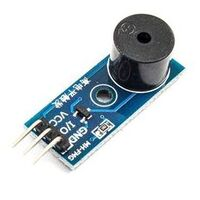
| 1x Buzzer
|
| Dupont wires
|
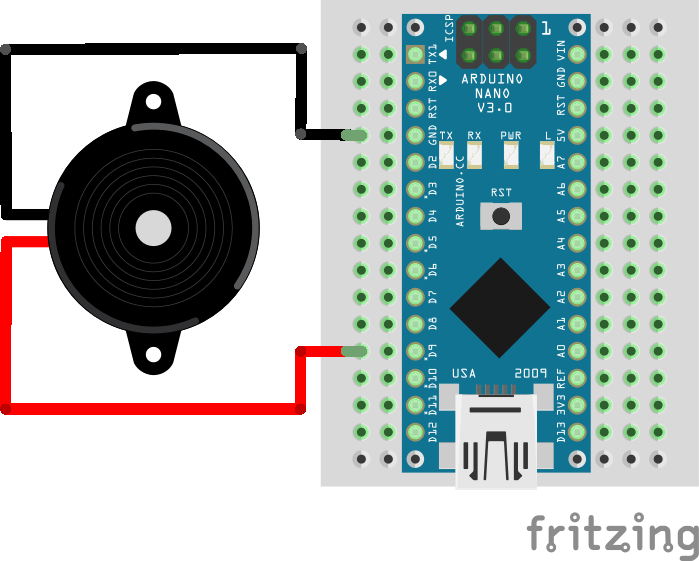
Wiring schema
Connecting an Arduino with a piezo buzzer is straightforward. The buzzer has two pins: one for the signal control and another for GND. In the setup below, the tone control will be managed by Arduino's D9 pin.

Arduino code
The tone() function produces a square wave with the given frequency (and a 50% duty cycle) on a designated pin. You can set a duration, otherwise the wave persists until a noTone() call. By using the Arduino tone() function, you can easily generate different frequencies, essentially playing musical notes.
Only one tone can be generated at a time. If a tone is already playing on a different pin, the call to tone() will have no effect. If the tone is playing on the same pin, the call will set its frequency.
If you are trying to make tones for the human ear, then values between 2000 and 5000 are where our ears are most tuned. Also, it is not possible to generate tones lower than 31Hz.
#define BUZZER_PIN 9

void setup()
{
  pinMode(BUZZER_PIN, OUTPUT);
}

void loop()
{
  tone(BUZZER_PIN, 1000); //Send 1KHz sound signal
  delay(1000);

  noTone(BUZZER_PIN); //Stop sound
  delay(1000);
}
Note: tone() function uses one of the built in timers on the Arduino’s micro-contoller and works independently of the delay() function. Use of the tone() will interfere with PWM output on pins 3 and 11 (on boards other than the Mega).
Credits
Official GitHub: https://github.com/hibit-dev/buzzer


0 Comments