Setting up SQLite with Docker Compose
Creating a Docker image with an SQLite database is a smart way to ensure that your application runs consistently across different environments. Docker simplifies the deployment process by allowing developers to package applications with all their dependencies into a single container. SQLite, being a lightweight database, fits well into this scenario. In this article, we'll walk through the steps needed to create a Docker image that includes an SQLite database, using Docker Compose for easy management.
Prerequisites
In this article, we will show you how to create a functional Docker environment. However, for a more in-depth understanding and detailed insights, we highly recommend referring to the following articles:
Installing Docker: Installing Docker Engine and Docker Compose
Docker images basics: Your first Docker Hub image from scratch
Docker containers basics: Docker compose introduction
Docker commands: Comprehensive cheatsheet of Docker commands
Setting up your project structure
Before getting into the Docker setup, start by organizing your project files. First, create a dedicated directory on your machine for the project; you might call it docker-sqlite. This folder will hold your Dockerfile and docker-compose.yml file. Keeping everything in one place makes the project easy to manage and update as needed. This simple organization step will help keep your setup clean and manageable from the start.
Building Docker image for SQLite
To create our SQLite image, we'll start by writing a simple Dockerfile. This file will define the setup for our Docker image, including the base OS and the commands to install SQLite. Using a minimal Linux distribution like Alpine is a good choice here, as it keeps the image size small. Here’s a basic Dockerfile setup:
# Start with a lightweight base image
FROM alpine:latest

# Install SQLite
RUN apk update && apk add sqlite

# Set the default working directory
WORKDIR /db

# Set the default command to open SQLite
CMD ["sqlite3"]
In this Dockerfile:
We use the
alpineimage as our base, known for its small footprint.apk add sqliteinstalls SQLite from the Alpine package manager.WORKDIR /dbsets/dbas the default directory for database files.CMD ["sqlite3"]sets up the container to launch SQLite’s interactive shell by default.
Building and running the Docker Image
With your Dockerfile created, it’s time to build and run the image. Open a terminal in the directory containing the Dockerfile and run the following command to build it:
docker build -t sqlite .
You will see the build progress and it will take a few seconds to complete. Once built, you can run the image interactively to use SQLite:
docker run -it sqlite
The -it flag ensures that the container runs in interactive mode, allowing you to work within SQLite's shell directly.
Testing the SQLite Container
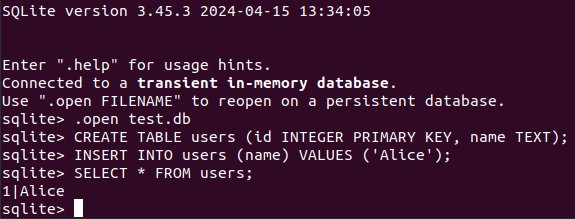
Now that the container is running, you can start creating databases and testing commands directly within the SQLite environment. For example, you can create a test database and add some data:
sqlite> .open test.db
sqlite> CREATE TABLE users (id INTEGER PRIMARY KEY, name TEXT);
sqlite> INSERT INTO users (name) VALUES ('Alice');
sqlite> SELECT * FROM users;
These commands create a simple database with a table and one entry.

This setup can be saved as part of your Docker workflow or adjusted to meet your specific needs.
Writing the Docker Compose file
While Docker alone is great for managing individual containers, Docker Compose allows you to easily manage multi-container applications and define your environment in a single configuration file. If you're building an application that needs SQLite, Docker Compose can streamline the process of running your SQLite container along with other services your application might need.
To get started with Docker Compose, you’ll need to create a docker-compose.yml file in your project directory. This file defines the services, networks, and volumes that Docker Compose will manage. For our SQLite image, the docker-compose.yml file will look something like this:
services:
  #...
  # Other services
  #...
  sqlite:
    image: hibitdev/sqlite:latest
    container_name: sqlite
    hostname: sqlite.hibit
    ports:
      - "8191:8191"
    volumes:
      - ./sqlite:/db
    command: ["tail", "-f", "/dev/null"]  # Keeps the container running
This configuration provides a convenient, isolated environment for SQLite.
Running the application with Docker Compose
Once your docker-compose.yml is set up, you can build and start your container with just one command:
docker-compose up --build -d
This command builds the image (if it hasn’t been built already) and starts up the service defined in your docker-compose.yml. To stop the services, you can run:
docker-compose down
Using Docker Compose in this way ensures that your application, along with its SQLite database, is packaged and configured in a simple, consistent manner.
Testing the application with Docker Compose
Once Docker Compose has built and started the container, you can access it and use SQLite to interact with the database.
sqlite> .open database.db
sqlite> CREATE TABLE users (id INTEGER PRIMARY KEY, name TEXT);
sqlite> INSERT INTO users (name) VALUES ('Alice');
sqlite> SELECT * FROM users;
These commands open an existing database.db empty file, create a users table, add one entry, and display all records in the table.

After exiting the container, you'll notice that the database.db file on your machine has increased in size, indicating that the data we just added is now stored in the file.
Connecting to SQLite
You may need to update your local hosts file to ensure that your services can be accessed using the specified hostnames. To do this, open your hosts file and add the following lines:
127.0.0.1 sqlite.hibit # replace with hostname chosen in Docker Compose configuration
This step maps the hostname sqlite.hibit to your local machine, allowing you to connect to the SQLite service using these friendly name instead of IP address. Updating the hosts file simplifies access and improves the overall usability of your Docker environment.
Conclusion
Creating a Docker image with SQLite provides a straightforward way to keep your database setup portable and consistent. By packaging SQLite in a Docker container, you gain flexibility to deploy it quickly in different environments with minimal setup, keeping your applications lean and reliable. This approach can be a helpful tool in your development process, especially when building lightweight or embedded database applications.
Credits
Official GitHub: https://github.com/hibit-dev/sqlite-containerization
Official DockerHub: https://hub.docker.com/r/hibitdev/sqlite


0 Comments