Simple steps for building circuits with breadboards
A breadboard is an essential tool for working with electronics. It provides a quick and convenient way to test, build, and modify circuits without soldering. Named after the wooden boards originally used to organize components, modern breadboards are plastic boards filled with a grid of tiny holes and internal connectors. This structure lets you easily plug in components and wires, making it ideal for experimenting and prototyping before committing to a permanent setup.
Components
| Breadboard
|
| Mini-breadboard
|
| Micro-breadboard
|
| Dupont wires
|
Breadboard layout
At first glance, a breadboard may seem complex, but its design is logical and easy to grasp. The breadboard has two main sections: the central grid for components and the power rails running along the edges.

The central grid is where most of your components will go. It’s split into two halves by a gap called the trench. This trench is specifically designed to hold integrated circuits (ICs), ensuring each pin has its own row of connection points. Within each half, rows are divided into groups of five holes, and each group is internally connected. This means if you plug a component's leg into one hole in a group, it is electrically connected to the other holes in that same group.
The power rails run along the top and bottom edges of the breadboard. These are continuous lines of connected holes marked with "+" for positive and "-" for negative. Power rails are dedicated to distributing voltage and ground throughout your circuit, making it easier to power all components without additional wires. Understanding these sections and how they interconnect is crucial to assembling circuits effectively.
Mini Breadboards
Mini breadboards are compact versions of standard breadboards, typically featuring 170 connection points. They retain the essential features of larger breadboards, including rows of connected holes and simplified power rails.
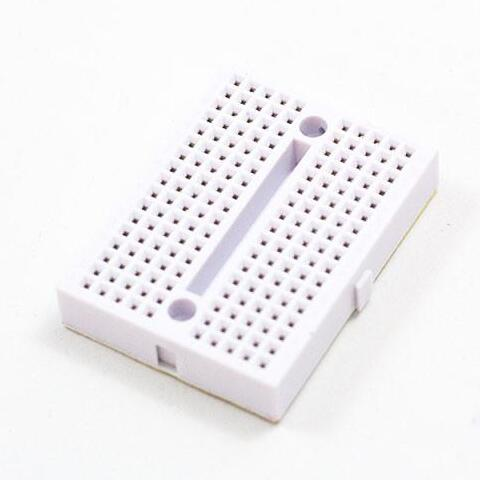
These breadboards are perfect for small circuits, such as testing sensors or powering simple LED setups, where a full-sized board would be excessive. Mini breadboards are commonly used in projects with limited space, like compact prototypes or portable electronics.
Micro Breadboards
Micro breadboards take miniaturization a step further, offering an even smaller grid with fewer connection points. These breadboards are ideal for projects that demand extreme portability, such as wearable devices or very simple circuits.
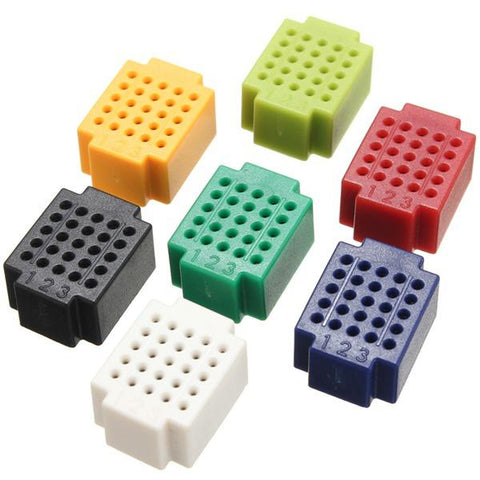
Despite their size, they function just like their larger counterparts, making them a practical choice for testing individual components or assembling minimal circuits. Many micro breadboards also feature adhesive backs, allowing them to be easily attached to other surfaces for stability in tiny project enclosures.
How to use a breadboard for your circuit
Using a breadboard starts with having a clear plan for your circuit. Begin by preparing your components, such as resistors, LEDs, capacitors, or transistors, along with your power source and jumper wires. Follow these steps to get started:
Set up the power rails: first, connect your power source (like a battery or a regulated power supply) to the breadboard's power rails. Ensure the positive and negative terminals of the power source align with the "+" and "-" markings. You can use jumper wires to connect the power rails across the breadboard for uniform power distribution.
Place components on the central grid: insert each component into the central grid, making sure the legs are in the correct rows for proper connectivity. For example, if you're using a resistor, one leg might go into a row connected to an LED, while the other connects to a power rail.
Connect the circuit with jumper wires: use jumper wires to complete connections between components and power rails. Wires bridge different rows or sections of the breadboard, creating the desired pathways for electricity to flow.
Test and adjust: power on your circuit and test its functionality. If something isn't working, the breadboard makes it easy to adjust components or wiring until you get the desired result.
For a simple example, consider building a circuit to light up an LED. Connect the longer leg of the LED to a resistor, and then attach the resistor to the positive power rail. The shorter leg of the LED connects to the ground power rail. When powered, the LED should light up, demonstrating a basic but important concept in electronics.
Best practices for working with breadboards
Plan ahead: sketch your circuit diagram or use simulation software to plan the layout before building it.
Color-code your wires: stick to using specific colors for power (red for positive, black for negative) and other connections.
Keep components secure: ensure all components are firmly inserted into the breadboard to avoid loose connections.
Organize your design: arrange components and wires neatly to make debugging easier.
Use multimeters: test connections with a multimeter to verify that power flows as expected.
Once your circuit functions correctly on the breadboard, you can transfer it to a solderable protoboard or printed circuit board (PCB). Replicating the layout you tested ensures a durable and long-lasting version of your design.
Conclusion
Breadboards make learning and experimenting with electronics accessible and efficient. They provide a practical platform to test ideas and refine designs, empowering you to confidently move from concept to reality. Whether working on a beginner’s project or developing a complex prototype, the breadboard is an indispensable tool for electronic creativity.





0 Comments