How to install MongoDB 6 on Ubuntu 20.04
MongoDB is a popular open source and document oriented database system. It belongs to a family of databases called NoSQL, which is different from the traditional table based SQL databases. It makes use of collections, each having multiple documents, and allows the user to store data in a non relational format. Data is stored in flexible, JSON-like documents where fields can vary from document to document. That's the reason for calling it schemaless database.
MongoDB is highly scalable and flexible. It is used for building modern applications that require powerful, mission critical and high availability databases.
Installing MongoDB
MongoDB can be installed using the apt packaging system. First you need to update your system repository:
sudo apt-get update
Proceed installing MongoDB server:
sudo apt install -y mongodb
Apt manager will install MongoDB and required dependencies.
Check the service status with systemctl command:
sudo systemctl status mongodb

Make sure the installation is completed successfully running connection status command:
mongo --eval 'db.runCommand({ connectionStatus: 1 })'
The value "ok" : 1 indicates that the server is working properly with no errors.
Managing the MongoDB process
Once your database server is up you can use the following commands to manage the mongodb process:
sudo systemctl [stop|start|restart|disable|enable] mongodb
Configuring MongoDB
MongoDB default configuration file is located at /etc/mongodb.conf. By default, each user will have access to all databases and perform any action. For production environments, it is recommended to enable the MongoDB authentication.
Authentication
To enable the authentication uncomment the auth directive in the config file.

Restart mongodb service to apply the new configuration:
sudo systemctl restart mongodb
Creating an administrator
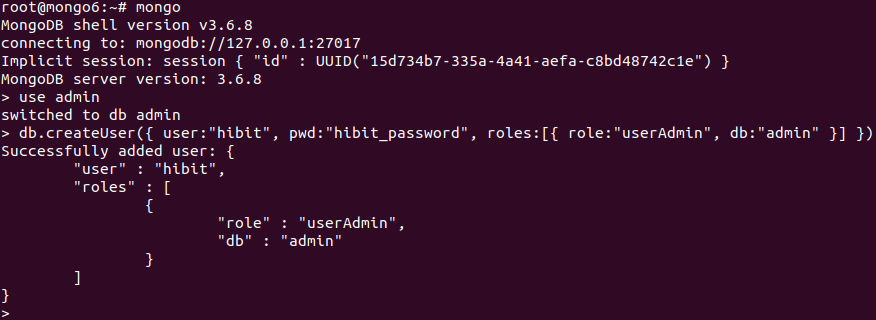
When authentication is enabled, administrator is needed to access and manage MongoDB instance. To create an admin user access MongoDB shell:
mongo
From inside the shell connect to the admin database:
use admin
Once it has switched, create a user for your MongoDB installation setting desired username and password:
db.createUser({ user:"hibit", pwd:"hibit_password", roles:[{ role:"userAdmin", db:"admin" }] })A new user with userAdmin role will be created on admin database.

We've taken userAdmin built-in role for this user. You can find more roles, with detailed description, on the official MongoDB documentation: built-in roles.
Exit from MongoDB console:
quit()
Authenticating MongoDB connection
Try to connect to MongoDB with the user created in the previous step:
mongo -u hibit -p --authenticationDatabase admin
You will be asked to provide your password and then you will have access to MongoDB shell.

Remote access
By default, MongoDB can only be accessed locally. To be able to access the database remotely we will make a small change in the configuration file: /etc/mongodb.conf. Find bind_ip directive and append your MongoDB IP address separated with comma.

Note: this should be the IP address of the server on which you've installed MongoDB and not the remote IP addresses you trust.
Restart mongodb service to apply the new configuration:
sudo systemctl restart mongodb
Remote access to the server IP via port 27017 is now open. You can perform a quick test accessing to MongoDB server IP (including the port) in your browser address bar. The following message should appear:
It looks like you are trying to access MongoDB over HTTP on the native driver port.
Remote access firewall
Having MongoDB exposed without any additional security is risky. We recommend you to allow only trusted remote IP addresses on the firewall.
sudo ufw allow from trusted-ip to any port 27017
This will block remote incoming connections from non trusted IP addresses.
Conclusion
In the above guide, we've learned how to install and configure MongoDB server on Ubuntu 20.04. For additional information, you can visit MongoDB official documentation and find all possible options for the fine tuning.


0 Comments