LED


Interfacing laser diode module with Arduino
  • avatar
  • 2.7K Views
  • 4 mins read
Preview post image

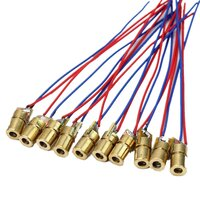
Laser modules emit highly focused beams of light, making them ideal for a wide range of applications. One of the key aspects of a laser module is its power output, typically measured in milliwatts (mW). Arduino compatible laser modules typically have a power output within the lower range ensuring safety and compatibility with the microcontroller board. It's important to note that modules require safety precautions due to their increased risk of eye damage and potential fire hazards for higher-power lasers.

DIY - Automated plants watering system

  • avatar
  • 2.2K Views
  • 2 Likes
  • 17 mins read
Preview post image

In the world of do-it-yourself (DIY) projects, few activities match the practicality of constructing your own Arduino-powered automatic watering system. Imagine a setup where technology integrates effortlessly with nature, allowing you to take control of your plant care routine. We'll break down the fundamental components of this project, highlighting the vital role of the DS1302 timekeeping module and Arduino-compatible pumps. Get ready for a hands-on approach that not only enhances your technical skills but also transforms the way you care for your plants, whether they are in the corners of your home or under the open sky.

DIY - Automated plants watering system: mounting

  • avatar
  • 2.1K Views
  • 1 Like
  • 10 mins read
Preview post image

As we transition into the practical implementation of our Arduino-powered automatic watering system, the focus shifts from theory to the tangible. This section of the guide will meticulously guide you through the steps of physically mounting the components, integrating sensors, and establishing the necessary connections between modules. It's an opportunity to transform conceptual understanding into hands-on reality. Prepare to immerse yourself in the practical aspects of this project, where we navigate through the nuances of placing each module and executing the precise wiring required to bring your plants care system to life.

 Join Our Monthly Newsletter

Get the latest news and popular articles to your inbox every month

We never send SPAM nor unsolicited emails

DIY - Automated plants watering system: code

  • avatar
  • 2.1K Views
  • 2 Likes
  • 8 mins read
Preview post image

Having outlined the concept of automated watering and successfully assembled the physical components, our attention now turns to the real wizardry - the code. This article explores the intricate lines of Arduino code that transform theory into reality, breathing life into our DIY plant care project. As we step into the heart of our automated watering system, let's unravel the details that make our green vision a reality.

How to use tricolor LED module with Arduino

  • avatar
  • 2.6K Views
  • 3 Likes
  • 4 mins read
Preview post image

The KY-016 is capable of producing wide range of different colors by mixing blue, green and red lights. The RGB LED module will not require any limiting resistors. Those resistors are already integrated in the circuit, and so 5V can be directly used as power input.

Understanding SIPO Shift Registers

  • avatar
  • 1.6K Views
  • 7 mins read
Preview post image

Shift registers are integral components in digital electronics, enabling efficient data management and transfer. When working on Arduino projects, you may quickly run into the issue of not having enough output pins to control all your components. This is where SIPO (Serial-In, Parallel-Out) shift registers come into play. These devices allow you to manage multiple outputs with just a few pins on your Arduino, making them a powerful tool for more complex projects involving numerous LEDs, buttons or other peripherals. This article explores why shift registers are necessary, how they function, and their practical applications with Arduino.

Controlling a LED with Arduino

  • avatar
  • 1.8K Views
  • 6 mins read
Preview post image

Light Emitting Diodes (LEDs) are incredibly adaptable components often employed in electronics projects for various purposes, from indicating status to creating captivating lighting effects. When it comes to managing LEDs with an Arduino, you have the option of utilizing either digital pins or Pulse Width Modulation (PWM) pins. In this article, we'll explore the advantages of each method and provide you with a comprehensive guide on how to control LEDs using an Arduino.

Simple steps for building circuits with breadboards

  • avatar
  • 226 Views
  • 6 mins read
Preview post image

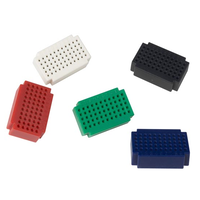
A breadboard is an essential tool for working with electronics. It provides a quick and convenient way to test, build, and modify circuits without soldering. Named after the wooden boards originally used to organize components, modern breadboards are plastic boards filled with a grid of tiny holes and internal connectors. This structure lets you easily plug in components and wires, making it ideal for experimenting and prototyping before committing to a permanent setup.